Mead is honey wine — literally just honey, water, and yeast fermented together, with a history stretching back thousands of years before grape wine was a glint in anyone’s amphora. If you’ve been making fruit wine or grape kits for a season or two, mead is a natural and genuinely exciting next project: the ingredient list is short, the fermentation timeline is flexible (anywhere from three weeks for a “quick mead” to eighteen months for a big traditional), and honey brings flavors — floral, waxy, funky, crystalline — that no other fermentation substrate quite matches. But here’s the part the beginner kit descriptions leave out: mead is also one of the easiest fermentations to stall or ruin, because honey is nutritionally almost empty for yeast. Without the right additives and a deliberate feeding strategy (called a staggered nutrient addition, or SNA), your mead will either crawl to a halt at 8% alcohol or finish tasting like nail polish remover. The good news is that once you understand why those nutrients matter, mead is deeply teachable — and this guide will walk you through exactly what a starter kit should include, where the real traps are, and when it makes sense to scale up.
| EDITOR'S PICK[Complete Mead Making Kit for Be…](https://www.amazon.com/dp/B0GV6B1W3N?tag=greenflower20-20) | Mid-tier[FastRack 1 Gallon Mason Jar Wid…](https://www.amazon.com/dp/B01AK8GPIW?tag=greenflower20-20) | Budget pick[FastRack - Shepherd Made Mead M…](https://www.amazon.com/dp/B00K5Z78SC?tag=greenflower20-20) | |
|---|---|---|---|
| Includes Yeast | — | — | ✓ |
| Includes Nutrient | — | — | ✓ |
| Includes Hydrometer | ✓ | — | — |
| Includes Auto Siphon | ✓ | — | — |
| Price | $62.99 | $25.29 | $18.09 |
| See on Amazon → | See on Amazon → | See on Amazon → |
Why Mead Fermentation Is Different From Wine — and Why That Matters for Your Kit Choice
When you ferment grape juice, the must (the liquid before fermentation) arrives pre-loaded with amino acids, vitamins, and trace minerals that yeast need to reproduce and stay healthy. Honey diluted in water — called “must” in mead-making too — has almost none of that. Yeast are essentially being asked to run a marathon on an empty stomach.
The practical consequence: yeast nutrient additions are not optional in mead-making; they are the technique. This is the single biggest gap between a novelty kit sold as a “mason jar mead experiment” and a setup that produces a repeatable, quality result.
The two nutrient products you need to know:
- Fermaid-O (organic nitrogen, from yeast hulls): the preferred primary nitrogen source for mead because it doesn’t contribute inorganic ammonia, which can stress yeast at higher additions. MoreWine!‘s mead resources and BSG Handcraft’s product documentation both position Fermaid-O as the standard for modern mead staggered nutrient addition protocols.
- Fermaid-K (a blend of inorganic nitrogen, vitamins, and minerals): historically the default, still widely used, often paired with Fermaid-O in a hybrid protocol when the Brix (sugar density) of the must is high.
A kit that doesn’t include one of these — or that sends you home with a single packet of generic “wine nutrient” — is teaching you nothing useful. Penn State Extension’s home winemaking fermentation overview notes that nitrogen deficiency is one of the most common causes of stuck fermentation across all fruit wines, and in mead that risk is compounded by the honey’s near-zero baseline.
By the numbers — what your must needs:
| Parameter | Target Range | Why It Matters |
|---|---|---|
| YAN (yeast assimilable nitrogen) | 250–350 ppm for standard mead | Below 150 ppm → stuck or sluggish ferment |
| Starting Brix (sugar density) | 22–28 °Brix for 12–15% ABV mead | Higher Brix = more osmotic stress on yeast |
| pH at pitch | 3.7–4.0 | Honey must runs acidic; buffer if needed |
| SO₂ (if stabilizing post-ferment) | 0.5 ppm molecular SO₂ | Matches dry wine standards for storage |
YAN target per MoreWine!‘s staggered nutrient addition protocol documentation; SO₂ guidance consistent with UC Davis enology resources.
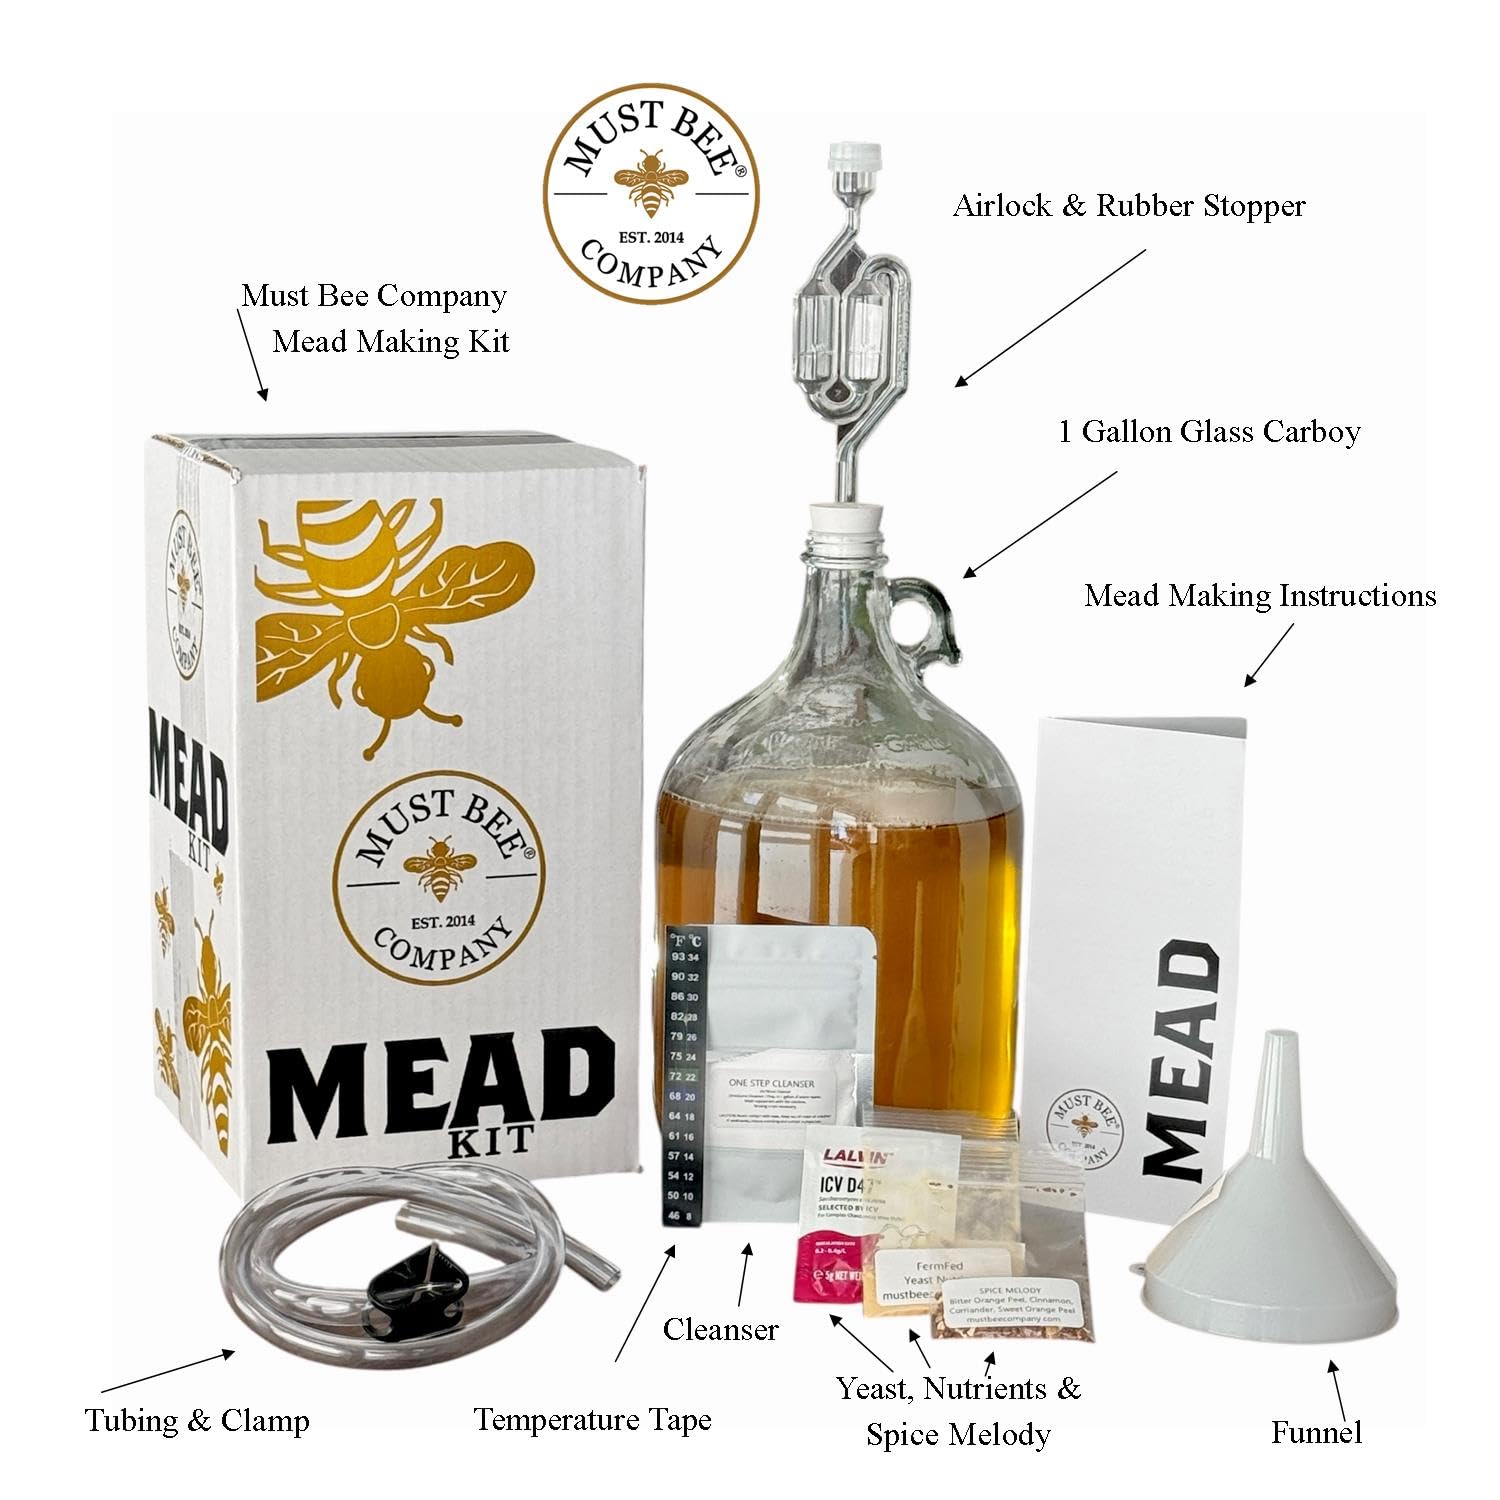
What a Good Starter Kit Actually Needs to Include
Walk through any homebrew retailer and you’ll see a lot of one-gallon glass jugs sold as “complete mead kits.” Some of them are genuinely useful starting points. Most are incomplete in the same two ways: they skip the nutrient protocol and they include a bung-and-airlock setup that makes degassing — releasing CO₂ that would otherwise stress your yeast — inconvenient enough that beginners skip it.
Here’s the hardware and consumables checklist worth holding any starter kit against:
Hardware (non-negotiable):
- A fermentation vessel with a wide enough mouth to stir — a 1-gallon glass carboy with a narrow neck forces you to use a drill-mounted degassing wand, which is workable but adds friction. Many mead makers prefer a 2-gallon wide-mouth bucket for primary fermentation specifically because it makes the twice-daily stirs of the SNA protocol easy. Owners in aggregated forum discussions and equipment reviews consistently flag the narrow-neck 1-gallon jug as the most common beginner frustration.
- An airlock and stopper — basic, universal, but confirm the stopper gauge matches your vessel.
- A hydrometer — for measuring sugar density (Brix or specific gravity) before and after fermentation. This is how you calculate ABV and confirm fermentation has finished. Non-negotiable.
- A thermometer — fermentation temperature matters more in mead than in many wines because honey musts at high Brix create osmotic stress that worsens sharply above 70°F.
Consumables (where most kits fall short):
- Lalvin 71B yeast — the near-universal recommendation for beginner and intermediate mead for good reason: it metabolizes some of the malic acid in honey must, producing a softer, rounder result, and it’s forgiving of slightly imperfect nutrient timing. Lalvin’s published yeast data sheet confirms its malic acid reduction activity and its moderate nitrogen requirement. Red Star Côte des Blancs is a reasonable alternative for sweeter meads.
- Fermaid-O — at minimum 1.5g per gallon for a standard SNA protocol.
- Potassium bicarbonate or calcium carbonate — for pH adjustment if your must drops below 3.5. Honey must can be surprisingly acidic depending on varietal.
- Potassium metabisulfite (KMS) — for sanitation and, later, stabilization before back-sweetening.
- Potassium sorbate — if you plan to back-sweeten (add honey after fermentation to taste), sorbate prevents re-fermentation.
A kit that includes yeast, nutrients, a hydrometer, and a vessel with a wide enough opening to stir is a kit worth buying. A kit that sends you Lalvin 71B, a Fermaid-O packet, and a printed SNA schedule is actually teaching you something. Winemaker Magazine’s feature on home mead-making identifies the SNA protocol — not the honey quality, not the yeast strain — as the highest-leverage variable separating clean meads from off-flavored ones.
The Staggered Nutrient Addition: The One Protocol Worth Learning Before You Pitch
If you take one thing from this article, make it this: mead fermentation is managed in stages, not pitched and left alone. The SNA protocol works like this.
Timing: You add nutrients at 24 hours post-pitch, 48 hours, 72 hours, and at the 1/3 sugar depletion point (when your hydrometer tells you roughly one-third of the original sugar has been consumed). Each addition is paired with degassing — vigorous stirring that drives off dissolved CO₂. CO₂ in solution is toxic to yeast at high concentrations; it also masks off-aromas that you want to catch early.
Why front-load early and stop at 1/3? Because yeast synthesize key survival factors — sterols, long-chain fatty acids — during the reproductive phase of fermentation (the first few days). Nutrients added after yeast have shifted into active ethanol production are largely wasted and can produce off-flavors from ammonia if using inorganic sources. MoreWine!‘s SNA documentation explains this timing rationale in detail and provides batch-size-adjusted dosing tables that are worth printing and taping to your fermentation area.
A practical Fermaid-O SNA schedule for a 1-gallon batch (per MoreWine! protocol):
- Pitch + 24h: 0.5g Fermaid-O, degas
- Pitch + 48h: 0.5g Fermaid-O, degas
- Pitch + 72h: 0.5g Fermaid-O, degas
- At 1/3 sugar depletion (~3–5 days, confirmed by hydrometer): 0.5g Fermaid-O, final degas
That’s 2g total per gallon — within the range MoreWine! recommends for low-to-moderate Brix musts. Higher Brix (26°+ for a bigger, stronger mead called a “sack mead”) may require a hybrid Fermaid-O / Fermaid-K approach; BSG Handcraft’s nutrient data sheets provide the inorganic nitrogen ceiling to stay below to avoid ammonium-driven off-flavors.
When to Scale Up: Moving From 1-Gallon to Carboys and Variable-Capacity Tanks
The 1-gallon batch is a learning environment. Once your SNA timing is dialed, you understand how your target honey varietal (wildflower, orange blossom, buckwheat) behaves, and you’ve produced two or three batches you’d actually serve to someone, it’s worth thinking about the economics and logistics of scaling.
3-gallon to 6-gallon glass carboys are the natural next step for most intermediate meadmakers. A 6-gallon glass carboy gives you the headspace management flexibility to rack off lees without significant oxidation exposure, and the volume makes nutrient dosing math more forgiving. Owners of both Better Bottle (PET plastic) and glass carboys consistently report that glass is easier to evaluate for clarity and color without pulling a sample — a meaningful quality-of-life advantage during the long cold-clearing phase mead often requires.
Speidel variable-capacity tanks (30L–120L) become relevant if you’re producing mead for a farm winery license, selling at a farmers market under a cottage food structure, or simply running five-to-ten batches per season. The floating lid eliminates headspace oxidation risk during long aging — the same reason boutique wineries use them. Published specs on Speidel’s line confirm food-grade polypropylene construction, graduated volume markings, and valve fittings compatible with standard racking canes and pump tubing.
If X, then Y — the decision rules:
- If you’ve never made mead: Start with a 1-gallon wide-mouth setup, Lalvin 71B, and a Fermaid-O SNA kit. Keep Brix under 24° (target ~12% ABV). Two batches with this setup will teach you more than any reading.
- If you’ve completed two clean 1-gallon batches and want to scale the recipe: Move to a 3- or 6-gallon carboy. Buy a refractometer ($25–$40 range) alongside the hydrometer — it saves must volume during the SNA check-ins.
- If you’re producing 10+ gallons per year and considering a winery license: Evaluate a Speidel 30L or 60L variable-capacity tank and Buon Vino filtration for clearing. The per-gallon cost math on honey ($5–$12/lb depending on varietal and sourcing in the 2026 market) makes large-batch efficiency meaningful quickly.
- If your last batch stalled below target ABV: Before changing anything else, check your YAN math and fermentation temperature. Nine times out of ten, a stalled mead is a nutrient or temperature problem, not a yeast problem — per MoreWine!‘s troubleshooting resources and consistent with Penn State Extension’s guidance on stuck fermentation causes.
Mead rewards patience and protocol more than almost any other fermentation. The honey does the interesting flavor work; your job is to keep the yeast happy long enough to let it. Get the nutrients right, get the timing right, and you’ll have something genuinely worth sharing — and a set of fermentation instincts that will sharpen every wine batch you make alongside it.